You must be comfortable with (or willing to learn!) simple HTML and have access to an image-editing software program in order to use this particular method of customizing one of Apple Mail’s existing stationery templates.
When contacting publishers or agents, beta readers and more, it can be cool to have email stationery that reflects your new book, new product, new service…whatever you want to share with the world. If you’re using Apple’s Mail program on your Mac, the tutorial that follows will take you step-by-step through the process of making your custom email template.
General Instructions for Working with Your New Template
You cannot move your new template outside of the Mail environment so nothing you normally do to work with or save a project will function as usual.
In general:
- Open a new Finder window
- Click through:
Finder > Macintosh HD > Library > App Support >
Apple > Mail > Stationery > Apple > Contents >
Resources > Custom > Contents > Resources
Start with an Existing Template
You can use any existing template as your starting point, but we have discovered that the best existing template for our purposes is Flower as it doesn’t require a lot of fussing.
|

Figure 4. I just love how computers automatically “file” folders and files alphabetically. |
|
Make This Email Template Yours
Import Your Images
Each template has a different width, so if you choose anything other than “flower”, check the width.
Note that the width (for Flower) is 740px. Ensure that any images which span the width of the template body look good at 740px (check the width if/when you choose any other template as they all different).
|
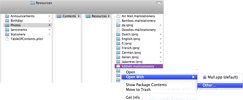
Figure 5. Displays the path to open your new template for customization. It’s a maze, and you’ll feel like you’re clicking for days. |
|
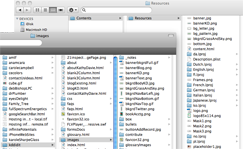
Figure 6. Having two Finder windows open makes it easier to keep track of the images you are copying into your new email template files. |
Customize Email Template
Keep in mind that, inside the
content.html, you can change the font, its color, and its size as well.
file
Apple uses tables to create their layout so be comfortable with HTML coding for tables.
<table><table> – contains the table; tells the browser that all the code in between is a table.
<tr></tr> – starts and ends a table row
You can have as many <tr>s as you want
<td></td> – contains the contents of a table cell and goes inside the <tr></tr>
The number of table cells in a row, <td>s, can depend upon the width of the actual table AND the width the table cell’s contents take up (or that you choose to dictate).
<table> Tells the browser that this is the beginning of a table layout
<tr> Indicates the start of a table row
<td>This begins the table cell contents
yadda-yadda, yadda
</td> Ends the table cell contents
Add <td></td>s as desired…
</tr> Indicates the end of a table row
</table> Ends the table layout
Using Your Images
Contrary to normal HTML/CSS coding, your images will not appear simply because you have changed the coding in the mailstationery. Each existing image for Flower needs to be replaced with your own images using THEIR filenames:
|

Figure 7. 740px wide x 414px high. It will expand as needed. |
|

Figure 8. 135px wide x 231px high. It will expand as needed. |
|

Figure 9. 740px wide x 129px high. |
|

Figure 10. 740px wide x 146px high. |
|

Figure 11. 66px wide x 90px high. This functions as the image you will see in the Mail program when you click |
Depending upon your design, you may simply rename your own image files to reflect the ones provided in mailstationery or open bg_letter, bottom, and top image files and replace the colors and textures with what is needed to create the custom design you want.
The texture/color used in bg_pattern can be replaced by anything you want; the size does not matter.
Once you have created a satisfactory template, the easiest way to create a new thumbnail image is to open Mail > New Message > Show Stationery > choose the new stationery you have just created and snap a screenshot (hold down CMD + SHIFT + 4 and then click-drag the mouse to encompass the new template). Open the screenshot in your image-editing program and change its size to 66px x 90px—otherwise it won’t appear in Mail.
Ensure Appearance of New Template in Mail
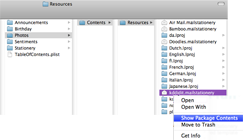
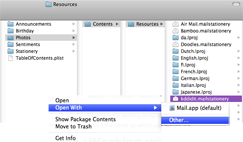
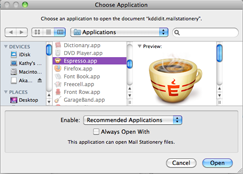
There are three places where you need to change the name of your template to ensure it will show up in Mail: content.html, Description.plist, and English.lproj > DisplayName.strings.
You must use the exact same spacing and capitalization in all four areas including the .mailstationery.
Content.html
|

Figure 12. Only |
Description.plist
|
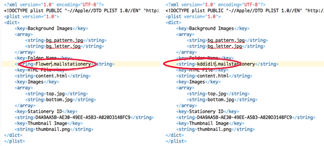
Figure 13. Look for the “.mailstationery” file extension to know which name to change in the |
DisplayName.Strings
|
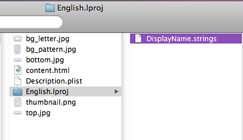
Figure 14. The LPROJ folders contain the |
|
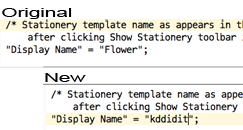
Figure 15. It’s even easier to changing the name in the |
Create a Thumbnail
Once you’ve customized the template’s appearance, you need to replace the existing thumbnail. The thumbnail is the reference that Mail displays when you click Show Stationery.
- Take a screenshot of the entire page
- Easiest if you create a “New Message” in Mail
- Click
Show Stationery - Navigate to
Custom - Double-click the new template
- Click
Hide Stationery - Adjust the message window so you see the whole template
- Click
CMD + SHIFT + 3to take picture of the entire screen
- Open your image-editing program
- Open the screenshot
- Crop it to just the template image
- Reduce the image size to 69px wide x 90px high
|
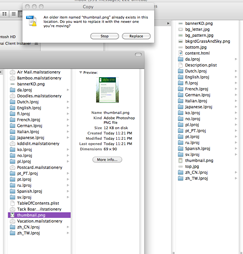
Figure 16. It’s a good thing! You do want to replace the existing thumbnail. |
Verify the Changes
Check out the name and thumbnail changes by:
- Open Mail
- Create a “New Message”
- Click “Show Stationery”
- Navigate to “Custom”
- And…voila!
Easily Send the Custom Template to Your Client
If you have created this custom template for a client, a family member, a friend, etc. you might want to make it easy for them to install it. You already know the long path you had to follow, do you really think they want to take that trek?
Create a DMG package that allows them to simply drag-and-drop to install the new template. And once you’ve got the DMG package install, you have it forever.
Troubleshooting
If, for some reason, the changes do not appear, shut down Mail and re-open it.
If the changes still do not appear, reboot the computer. Sometimes you just need to “recharge” the system!
If you found this tutorial useful, consider tweeting it.


